The Path to UI Development: A Roadmap to Success
Hi there, I'm Azad Malik Rohit, a UI developer with over 13 years of experience in front-end development. I'm passionate about creating beautiful and functional user interfaces that enhance the user experience. Over the years, I've honed my skills in various technologies such as React, JavaScript, and Next.js, among others.
Recently, I decided to share my knowledge and expertise with the world by creating a YouTube channel called "Learn Coding with Bhai @azadMalikRohit". On this channel, my team and I create videos related to UI development, including tutorials, tips and tricks, and best practices. Our goal is to make coding accessible and enjoyable for everyone, regardless of their skill level or background.
Whether you're a beginner looking to learn the basics of UI development or an experienced developer looking to enhance your skills, our channel has something for you. We believe that learning should be fun, engaging, and interactive, which is why we encourage our viewers to ask questions, provide feedback, and participate in our community.
So if you're interested in UI development, be sure to check out our channel and subscribe to stay updated on our latest content. We're excited to help you on your coding journey and look forward to hearing from you!
1. Learn the basics of HTML, CSS, and JavaScript:
HTML, CSS, and JavaScript are the foundational languages of the web. HTML is used to create the structure of a web page, CSS is used for styling and layout, and JavaScript is used for adding interactivity and dynamic behavior to a web page. There are plenty of resources available online to help you learn these languages, including free courses, tutorials, and documentation.
2.Get familiar with UI design tools:
UI designers use tools like Adobe Photoshop, Sketch, Figma, and Adobe XD to design user interfaces. As a UI developer, you will need to work closely with UI designers, so it's important to be familiar with these tools and understand how they work. You don't need to be an expert in design, but having a basic understanding of design principles and the design process can be helpful in collaborating with designers.
3. Learn a UI framework:
UI frameworks like React, Angular, and Vue.js are widely used in UI development. These frameworks provide a structured approach to building UIs and offer a range of pre-built components that can be customized. Learning a UI framework will make your development process faster and more efficient. Choose a framework that best suits your needs and become proficient in it.
4. Practice building UIs:
The best way to become a strong UI developer is to practice building UIs. Start with simple UIs and gradually move on to more complex ones. Take inspiration from existing UIs and try to replicate them. This will help you develop your skills and get a better understanding of how UIs work. Building your own projects and contributing to open-source projects can also be a great way to practice and gain experience.
5. Stay up-to-date with the latest trends and technologies:
UI development is a constantly evolving field, with new technologies and trends emerging all the time. To stay relevant and competitive, it's important to stay up-to-date with the latest developments. Follow industry blogs, attend webinars and conferences, and join online communities to stay informed.
6.Collaborate with other developers and designers:
Collaboration is key in UI development. Working with other developers and designers will help you learn new skills and approaches, and can lead to better solutions. Join online communities, participate in open-source projects, and attend meetups and conferences to connect with other professionals in the field.
7. Build a portfolio:
As you gain more experience, start building a portfolio of your work. This can include projects you've worked on, contributions to open-source projects, and any other relevant work. Your portfolio should showcase your skills and highlight your strengths as a UI developer. Having a strong portfolio can help you stand out when applying for jobs.
In conclusion, becoming a successful UI developer takes time, dedication, and hard work. Learning the basics of web technologies, getting familiar with UI design tools, learning a UI framework, practicing building UIs, staying up-to-date with the latest trends and technologies, collaborating with others, and building a portfolio of your work are all important steps in becoming a strong UI developer. By following these steps and staying committed to learning and growing, you can excel in this field and build a successful career as a UI developer.
You're welcome! We're glad you enjoyed the blog. Your support and engagement are important to us and help us create more great content for you.
Remember to like, subscribe, share, and support our channel to stay updated on new and exciting content.
Thank you for the support! We appreciate your engagement and it helps us continue to create valuable content for you. Please follow us on social media for updates and new content.
YouTube Channel :- https://www.youtube.com/@azadMalikRohit
Twitter: https://twitter.com/rohitazad
Facebook: https://www.facebook.com/rohitazadmalik/
Stackoverflow: https://stackoverflow.com/users/1365428/rohit-azad-malik
LinkedIn: https://www.linkedin.com/in/rohitazad/
Github: https://github.com/rohitazad
Showing posts with label HTML-CSS. Show all posts
Showing posts with label HTML-CSS. Show all posts
Thursday, May 4, 2023
Sunday, April 23, 2023
javascript interview questions and answers || call bind apply in javascript || Rohit Azad Malik
javascript interview questions and answers || call bind apply in javascript || Rohit Azad Malik
In this video, we will start by explaining what call(), bind(), and apply() methods are and how they work in JavaScript.
We will explore the differences between these methods, and you will learn when to use each method in your code. Additionally, we will cover some common interview questions related to these methods and show you how to solve them step by step. The video will be filled with code examples to help you better understand how these methods work in practice.
By the end of the video, you will have a solid understanding of call(), bind(), and apply() methods and feel more confident in your coding skills.
Ye JavaScript ke methods hain jo humein ek function ke this keyword ko set karne ke liye use kiye jaate hain.
Sabse pehle this keyword ke bare mein jaan lete hain. Jab aap ek object ke andar koi function define karte hain, to us function ke andar this keyword us object ko refer karta hai.
Lekin agar aap us function ko baahar nikal ke call karte hain, to this keyword global object window ko refer karega. Isiliye humein call, bind aur apply methods ka use karna hota hai.

call() method ek function ko call karta hai aur us function ke this keyword ko set karta hai. Aap call() method ko use karke, ek function ke arguments ko comma-separated list ki form mein pass kar sakte hain.
bind() method bhi ek function ke this keyword ko set karta hai, lekin wo us function ko call nahi karta hai. bind() method ek new function return karta hai, jiska this keyword set hota hai.
apply() method bhi ek function ko call karta hai aur us function ke this keyword ko set karta hai.
call() method ki tarah, apply() method ko bhi ek object se this keyword ko set kar sakte hain.
Iske alawa, apply() method ko arguments ko ek array ki form mein pass kiya jata hai.
Ummid hai ki aapko call(), bind(), aur apply() methods ke bare mein samajh aa gaya hoga.
Agar aapke paas koi aur sawaal hai, to aap poochh sakte hain.
Visit html css javascript tutorial in hindi with accessibility in - 2023 Playlist :-
Visit javascript tutorial in hindi - 2023 Playlist :-
Visit The Complete ReactJs Course - Basics to Advanced playlist :-
Visit Next.js Tutorials for Beginners to Advanced level 2023 in Hindi Playlist :-
You're welcome! We're glad you enjoyed the video. Your support and engagement are important to us and help us create more great content for you.
Remember to like, subscribe, share, and support our channel to stay updated on new and exciting content.
Thank you for the support! We appreciate your engagement and it helps us continue to create valuable content for you. Please follow us on social media for updates and new content.
YouTube Channel :- https://www.youtube.com/@azadMalikRohit
Twitter: https://twitter.com/rohitazad
Facebook: https://www.facebook.com/rohitazadmalik/
Stackoverflow: https://stackoverflow.com/users/1365428/rohit-azad-malik
LinkedIn: https://www.linkedin.com/in/rohitazad/
Github: https://github.com/rohitazad
Tuesday, February 7, 2023
next js tutorial in hindi || Introduction to Next.js || NextJs Tutorial for Beginners #1 - YouTube
next js tutorial in hindi || Introduction to Next.js || NextJs Tutorial for Beginners #1 - YouTube
Next.js is a free and open-source JavaScript framework for building server-side rendered and statically generated web applications. It's built on top of React, allowing developers to create fast and scalable applications with ease. Next.js also provides automatic code splitting, optimized performance, and developers can use a simple file-system based routing approach to create dynamic pages. Additionally, Next.js has built-in support for SEO and the ability to implement server-side rendering with ease.
Next.js is a popular framework for building web applications with React. It provides a suite of features and tools to help developers create fast and reliable applications that are easy to maintain and scale. Some of the key features of Next.js include:

Server-side rendering (SSR): Next.js allows developers to render pages on the server-side, which can improve performance and SEO.
Static site generation: Next.js can generate static HTML files from your React components, which can be served from a CDN for even faster performance.
Automatic code splitting: Next.js automatically splits your code into smaller chunks, so that only the necessary JavaScript is loaded for each page, reducing the size of the initial load and improving performance.
Easy Routing: Routing in Next.js is based on the file system, making it simple for developers to create dynamic pages.
Built-in optimization: Next.js includes several performance optimizations, such as lazy loading and image optimization, out of the box.
Community & ecosystem: Next.js has a strong and growing community of developers, and a thriving ecosystem of plugins and tools.
In summary, Next.js is a powerful and flexible framework that makes it easy for developers to create fast, scalable, and SEO-friendly web applications with React.
Visit The Complete ReactJs Course - Basics to Advanced playlist :- https://youtube.com/playlist?list=PLCag8k3PYB40oJ9DnfJMKSrhOUYNaLr-i
Visit Next.js Tutorials for Beginners to Advanced level 2023 in Hindi Playlist :- https://youtube.com/playlist?list=PLCag8k3PYB41A0gxgMJ-5Jk_1ofDAtekk
You're welcome! We're glad you enjoyed the video. Your support and engagement are important to us and help us create more great content for you. Remember to like, subscribe, share, and support our channel to stay updated on new and exciting content.
Thank you for the support! We appreciate your engagement and it helps us continue to create valuable content for you. Please follow us on social media for updates and new content.
YouTube Channel :- https://www.youtube.com/@azadMalikRohit
Twitter: https://twitter.com/rohitazad
Facebook: https://www.facebook.com/rohitazadmalik/
Stackoverflow: https://stackoverflow.com/users/1365428/rohit-azad-malik
LinkedIn: https://www.linkedin.com/in/rohitazad/
Github: https://github.com/rohitazad
Monday, January 30, 2023
redux in react js projects in hindi || building a multi-language react app with redux and json
redux in react js projects in hindi || personal portfolio react js using react js || redux tutorial
redux in react js projects in hindi || building a multi-language react app with redux and json
Creating a Multi-Language Page with Redux and ReactJS using JSON
 Building a Multi-Language React App with Redux and JSON
In this tutorial, we will walk through the process of building a multi-language React app using Redux and JSON. We will learn how to store translations in a JSON file, load it into the Redux store, and use the translations in our React components. The tutorial will cover the basics of internationalization and provide a step-by-step guide for implementing it in a React application. By the end of this tutorial, you will have a solid understanding of how to create a multi-language app with Redux and ReactJS.
Redux,
ReactJS,
Multi-Language,
Internationalization,
React Application,
Beginner-friendly,
Multi-language,
JSON,
Translation,
React application,
Internationalization in React,
Building multi-language app,
Beginner-friendly tutorial,
redux in react js projects in hindi,
personal portfolio react js using redux,
redux tutorial in hindi,
personal website react js,
react portfolio website tutorial,
rext js portfolio website,
portfolio react,portfolio website react js hindi,
react js redux tutorial in hindi,
react redux in hindi,
redux interview questions,
react interview questions in hindi,
redux react js hindi,
redux in react js in hindi,
redux react-redux npm,
react-redux project,
redux
Git Hub Source Code link :- https://github.com/rohitazad/rohit-azad-malik
Visit The Complete ReactJs Course - Basics to Advanced playlist :- https://youtube.com/playlist?list=PLCag8k3PYB40oJ9DnfJMKSrhOUYNaLr-i
You're welcome! We're glad you enjoyed the video. Your support and engagement are important to us and help us create more great content for you. Remember to like, subscribe, share, and support our channel to stay updated on new and exciting content.
Thank you for the support! We appreciate your engagement and it helps us continue to create valuable content for you. Please follow us on social media for updates and new content.
YouTube Channel :- https://www.youtube.com/@azadMalikRohit
Twitter: https://twitter.com/rohitazad
Facebook: https://www.facebook.com/rohitazadmalik/
Stackoverflow: https://stackoverflow.com/users/1365428/rohit-azad-malik
LinkedIn: https://www.linkedin.com/in/rohitazad/
Github: https://github.com/rohitazad
redux in react js projects in hindi || building a multi-language react app with redux and json
Creating a Multi-Language Page with Redux and ReactJS using JSON

In this tutorial, we will walk through the process of building a multi-language React app using Redux and JSON. We will learn how to store translations in a JSON file, load it into the Redux store, and use the translations in our React components. The tutorial will cover the basics of internationalization and provide a step-by-step guide for implementing it in a React application. By the end of this tutorial, you will have a solid understanding of how to create a multi-language app with Redux and ReactJS.
Redux,
ReactJS,
Multi-Language,
Internationalization,
React Application,
Beginner-friendly,
Multi-language,
JSON,
Translation,
React application,
Internationalization in React,
Building multi-language app,
Beginner-friendly tutorial,
redux in react js projects in hindi,
personal portfolio react js using redux,
redux tutorial in hindi,
personal website react js,
react portfolio website tutorial,
rext js portfolio website,
portfolio react,portfolio website react js hindi,
react js redux tutorial in hindi,
react redux in hindi,
redux interview questions,
react interview questions in hindi,
redux react js hindi,
redux in react js in hindi,
redux react-redux npm,
react-redux project,
redux
Git Hub Source Code link :- https://github.com/rohitazad/rohit-azad-malik
Visit The Complete ReactJs Course - Basics to Advanced playlist :- https://youtube.com/playlist?list=PLCag8k3PYB40oJ9DnfJMKSrhOUYNaLr-i
You're welcome! We're glad you enjoyed the video. Your support and engagement are important to us and help us create more great content for you. Remember to like, subscribe, share, and support our channel to stay updated on new and exciting content.
Thank you for the support! We appreciate your engagement and it helps us continue to create valuable content for you. Please follow us on social media for updates and new content.
YouTube Channel :- https://www.youtube.com/@azadMalikRohit
Twitter: https://twitter.com/rohitazad
Facebook: https://www.facebook.com/rohitazadmalik/
Stackoverflow: https://stackoverflow.com/users/1365428/rohit-azad-malik
LinkedIn: https://www.linkedin.com/in/rohitazad/
Github: https://github.com/rohitazad
Thursday, January 19, 2023
mastering the usecontext hook in react js in hindi || react context api project
mastering the usecontext hook in react js in hindi || react context api project || #17
In this video, we will be diving into the useContext Hook in React, a powerful tool for managing state and props throughout your application. We will explore how to create and use a context, as well as how to consume it in your components. By the end of this tutorial, you will have a strong understanding of how to use the useContext Hook in your own projects. Whether you are a beginner or an experienced React developer, this video is a great resource for mastering this important Hook.
useContext, React, context, state management, Hooks.

useContext, createContext, useState, and useEffect in React - A Comprehensive Tutorial
"Advanced use of useContext, createContext, useState, and useEffect in React"
"React Hooks Mastery: useContext, createContext, useState, and useEffect"
"useContext, createContext, useState and useEffect in React - A Beginner's Guide"
"React State Management with useContext, createContext, useState, and useEffect"
"useContext, createContext, useState, and useEffect: A Deep Dive into React Hooks"
"Efficient State Management in React with useContext, createContext, useState, and useEffect"
"Mastering React Hooks: useContext, createContext, useState, and useEffect"
"useContext, createContext, useState, and useEffect: Tips and Tricks for React Developers"
"useContext, createContext, useState, and useEffect: Best Practices for React Development"
"Simplifying State Management in React with useContext, createContext, useState, and useEffect"
"useContext, createContext, useState, and useEffect - A Practical Guide for React Developers"
"useContext, createContext, useState, and useEffect: A Hands-On Tutorial for React Developers"
"useContext, createContext, useState, and useEffect: A Step-by-Step Guide for React Developers"
"useContext, createContext, useState, and useEffect in React - An In-Depth Look"
"useContext, createContext, useState, and useEffect: A Comprehensive Tutorial for React Developers"
"useContext, createContext, useState, and useEffect: Unlocking the Power of React Hooks"
"useContext, createContext, useState, and useEffect in React: A Complete Guide"
"useContext, createContext, useState, and useEffect - A Deep Dive into React State Management"
"useContext, createContext, useState, and useEffect: Tips and Tricks for React State Management"
"useContext, createContext, useState, and useEffect: A Masterclass for React Developers"
Git Hub Source Code link :- https://github.com/rohitazad/context-api-reactjs-login-logout-functionality
Visit The Complete ReactJs Course - Basics to Advanced playlist :- https://youtube.com/playlist?list=PLCag8k3PYB40oJ9DnfJMKSrhOUYNaLr-i
You're welcome! We're glad you enjoyed the video. Your support and engagement are important to us and help us create more great content for you. Remember to like, subscribe, share, and support our channel to stay updated on new and exciting content.
Thank you for the support! We appreciate your engagement and it helps us continue to create valuable content for you. Please follow us on social media for updates and new content.
YouTube Channel :- https://www.youtube.com/@azadMalikRohit
Twitter: https://twitter.com/rohitazad
Facebook: https://www.facebook.com/rohitazadmalik/
Stackoverflow: https://stackoverflow.com/users/1365428/rohit-azad-malik
LinkedIn: https://www.linkedin.com/in/rohitazad/
Github: https://github.com/rohitazad
Tuesday, November 29, 2022
react js components tutorial Importing and Exporting Components | Complete React Course in Hindi #4
react js components tutorial Importing and Exporting Components | Complete React Course in Hindi #4
Complete react course: In this react course, we will see how to used React js components import and export.

Export your function component from that file (using either default or named exports).
Guys, Please support my channel by SUBSCRIBE to my channel and share my videos in your Social Network TimeLines.
So, Like , subscribe, share, and support to keep us motivating.
Don't Forget to Follow me on all Social Network,
YouTube Channel :- https://www.youtube.com/@azadMalikRohit
Twitter: https://twitter.com/rohitazad
Facebook: https://www.facebook.com/rohitazadmalik/
Stackoverflow: https://stackoverflow.com/users/1365428/rohit-azad-malik
LinkedIn: https://www.linkedin.com/in/rohitazad/
Github: https://github.com/rohitazad
Monday, November 28, 2022
create react app with create-react-app | NPX | Complete React Course in Hindi #3
create react app with create-react-app | NPX | Complete React Course in Hindi #3
Complete react course: In this react course, we will see how to used NPX create-react-app using projects. we will look into creating a new react app using create-react-app.

Complete react course: In this react course, we will see how to use react js. React is an amazing library for creating user interfaces.
React is a JavaScript library created by Facebook
React is a User Interface (UI) library
React is a tool for building UI components
You will be learn how to setup npx create-react-app in start.
You will be learn about folder structure.
Guys, Please support my channel by SUBSCRIBE to my channel and share my videos in your Social Network TimeLines.
So, Like , subscribe, share, and support to keep us motivating.
Don't Forget to Follow me on all Social Network,
YouTube Channel :- https://www.youtube.com/@azadMalikRohit
Twitter: https://twitter.com/rohitazad
Facebook: https://www.facebook.com/rohitazadmalik/
Stackoverflow: https://stackoverflow.com/users/1365428/rohit-azad-malik
LinkedIn: https://www.linkedin.com/in/rohitazad/
Github: https://github.com/rohitazad
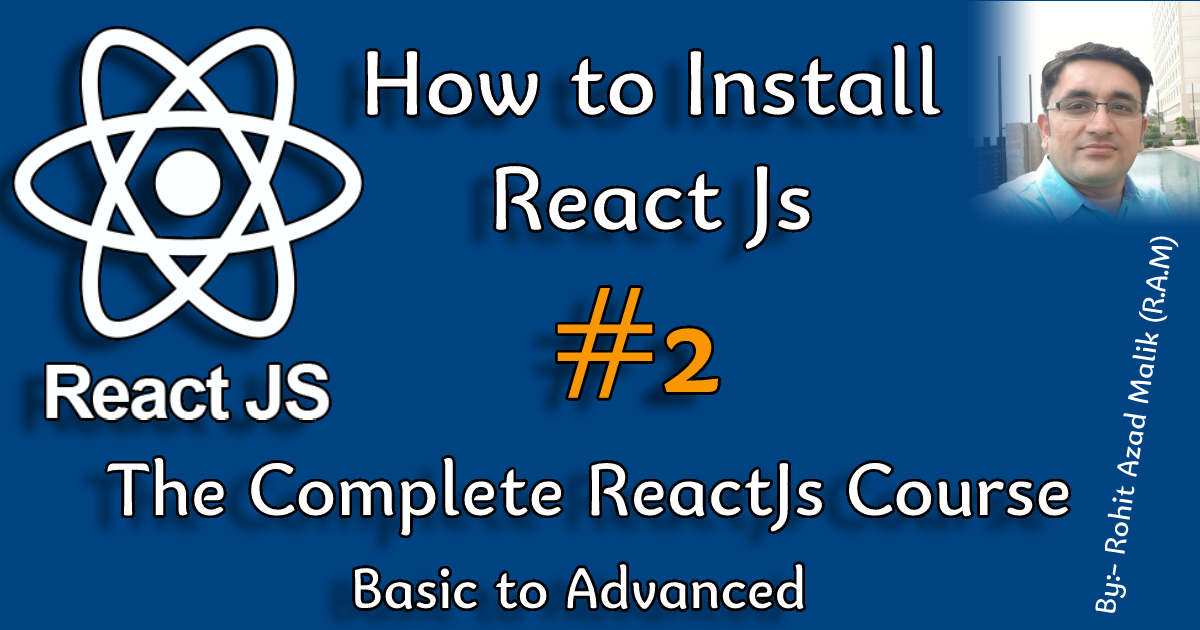
react setup in visual studio code | how to install react js | Complete React Course in Hindi #2
react setup in visual studio code| how to install react js | Complete React Course in Hindi #2
in this video you will be learn some basic concepts How to create react app boiler by Rohit Azad Malik (R.A.M)
Complete react course: In this react course, we will see how to use react js. React is an amazing library for creating user interfaces.
React is a JavaScript library created by Facebook
React is a User Interface (UI) library
React is a tool for building UI components
You will be learn how to setup react js in start.
You will be package json file .
You will be learn about folder structure.
Guys, Please support my channel by SUBSCRIBE to my channel and share my videos in your Social Network TimeLines.
So, Like , subscribe, share, and support to keep us motivating.
Don't Forget to Follow me on all Social Network,
YouTube Channel :- https://www.youtube.com/@azadMalikRohit
Twitter: https://twitter.com/rohitazad
Facebook: https://www.facebook.com/rohitazadmalik/
Stackoverflow: https://stackoverflow.com/users/1365428/rohit-azad-malik
LinkedIn: https://www.linkedin.com/in/rohitazad/
Github: https://github.com/rohitazad
Thursday, November 10, 2022
Movies and TV Series Searching App in React JS | Movies App | React App | ReactJs Project
Movies and TV Series Searching App in React JS | Movies App | React App | ReactJs Project
 In this tutorial we'll be creating a movie application using React, Routing, Axios, React Bootstrap Css, React Pagination, React Alice Carousel implementing React Hooks, and fetching data from an external API (The Movie Database).
In this video we creating a home page with call a api using useEffect lifecycle hook and do a pagination in bottom.
Let's Create a Movies and TV Series App in React JS and React Bootstrap with full responsive functionality. We will use MovieDB API for backend.
We create multiple pages :-
1. Top Trending
2. Top Trending Movies with Filter By Categories
3. Top Trending TV Series with Filter By Categories
4. Search Movies / TV Series
5. CONNECT WITH US
6. About Page
1. App setup
2. React Routing
3. Dynamic Routing
4. AXIOS setup and used
5. React Bootstrap install and setup
6. Bootstrap Icons
7. React Pagination
8. React Alice Carousel
9. themoviedb API used and setup
Movie API Document Page Url
:- https://www.themoviedb.org/documentation/api
(Create an account and request an API key) Movie API Home Page Url
:- https://www.themoviedb.org/
GitHub source code url :- https://github.com/rohitazad/my-entertainment-react
app live url :- https://my-entertainment-react.vercel.app/
So, Like , subscribe, share, and support to keep us motivating.
Don't Forget to Follow me on all Social Network,
Twitter: https://twitter.com/rohitazad
Facebook: https://www.facebook.com/rohitazadmalik/
Stackoverflow: https://stackoverflow.com/users/1365428/rohit-azad-malik
LinkedIn: https://www.linkedin.com/in/rohitazad/
Github: https://github.com/rohitazad
Checkut t my chaanel in youtube :- https://www.youtube.com/c/AzadMalikRohit
map filter reduce in hindi | JavaScript Tutorial in Hindi | higher order function in hindi
map filter reduce in hindi | JavaScript Tutorial in Hindi | higher order function in hindi

map filter reduce in hindi | JavaScript Tutorial in Hindi | higher order function in hindi .
Map, filter & reduce Array functions are the most popular Higher-Order Functions in JavaScript In this article you will learn everything about map filter reduce sort and forEach Between Regular Functions and Arrow Functions basic + advanced javascript in hindi.
In this article I cover everything you need to know about the higher order function in Regular Functions and Arrow Functions .
Concepts Covered:
1. forEach
2. Filter
3. map
4. sort
5. reduce
now let's create two variable and used to both variable in HOF (higher order function)
1.forEach (let's used to forEach method in peopleData variable)
used to first normal loop
now in this code we do the normal loop with peopleData length and console log print to every item with index no.
now let's write to this in ES5 Regular function with forEach
in this above code you can see to we pass to call back function in forEach HOF and log to object with index no.
now let's write to this in ES6 with fat arrow
now you can write to this in a single line code
2. filter in javascript means you can filter something in array of collection.
now let's check the code and how to used filter method in javascript and if we have no filer then used to normal for loop .
in this above code we used to normal loop in javascript and filter to data base on category.
let's we used to filter method and check to result.
now here we can used to ES5 Regular function and result is coming same.
Now if we used to ES6 fat arrow function then let's check .
now you can see to same result print in console and we used to here fat arrow function with in single line for filter method.
3. map method used to javascript map method you can manipulate the data base on the requirements.
like this if we required a node extra with dicountPrice in total price of 10% then we used to map method and we also used to normal loop.
let's check with normal loop / ES5 function and ES6 fat arrow function in below code
do with in ES5 Regular function.
do with in ES6 fat arrow function.
now you can see above code we get same result of if we used normal loop / ES5 Regular function and ES6 fat arrow function.
4. sort method is used to sorting data base on two element .
now let's check the code of sort method .
we used to first Descending order the data in base on age we apply to age sorting in ES5 Regular function.
and in second method we used to ES6 function and sorting the data base on price in Ascending order in single line code.
5. Reduce method now check this method in javascript . now check first we used to normal loop in javascript.

map filter reduce in hindi | JavaScript Tutorial in Hindi | higher order function in hindi .
Map, filter & reduce Array functions are the most popular Higher-Order Functions in JavaScript In this article you will learn everything about map filter reduce sort and forEach Between Regular Functions and Arrow Functions basic + advanced javascript in hindi.
In this article I cover everything you need to know about the higher order function in Regular Functions and Arrow Functions .
Concepts Covered:
1. forEach
2. Filter
3. map
4. sort
5. reduce
now let's create two variable and used to both variable in HOF (higher order function)
const peopleData = [
{name:'Mobile', category:'Gadget', age:5, price:25000},
{name:'TV', category:'Appliances', age:10, price:35000},
{name:'Washing Machine', category:'Appliances', age:15, price:42000},
{name:'HeadFone', category:'Gadget', age:3, price:12000},
{name:'Microwaves', category:'Appliances', age:5, price:13500},
{name:'Mixer', category:'Appliances', age:10, price:9000}
]
const ageData = [12,7,11,23,18,22,17,9,22,32,45,28,6,4,13]
1.forEach (let's used to forEach method in peopleData variable)
used to first normal loop
for(let i =0; i< peopleData.length; i++){
console.log(i,'__', peopleData[i])
}
now in this code we do the normal loop with peopleData length and console log print to every item with index no.
now let's write to this in ES5 Regular function with forEach
peopleData.forEach(function(item, index){
return console.log(index, '_', item)
})
in this above code you can see to we pass to call back function in forEach HOF and log to object with index no.
now let's write to this in ES6 with fat arrow
peopleData.forEach((item, index)=>{
return console.log(index, '_', item)
})
now you can write to this in a single line code
peopleData.forEach(item=>{console.log(item)})
2. filter in javascript means you can filter something in array of collection.
now let's check the code and how to used filter method in javascript and if we have no filer then used to normal for loop .
const filterData = []
for(let i=0; i< peopleData.length; i++){
if(peopleData[i].category === 'Gadget'){
filterData.push(peopleData[i])
}
}
console.log(filterData);
in this above code we used to normal loop in javascript and filter to data base on category.
let's we used to filter method and check to result.
const filterData = peopleData.filter(function(item){
return item.category === 'Gadget'
})
console.log('filterData', filterData);
now here we can used to ES5 Regular function and result is coming same.
Now if we used to ES6 fat arrow function then let's check .
const filterDataArrowFun = peopleData.filter(item=>item.category === 'Gadget')
console.log('filterDataArrowFun', filterDataArrowFun)
now you can see to same result print in console and we used to here fat arrow function with in single line for filter method.
3. map method used to javascript map method you can manipulate the data base on the requirements.
like this if we required a node extra with dicountPrice in total price of 10% then we used to map method and we also used to normal loop.
let's check with normal loop / ES5 function and ES6 fat arrow function in below code
const updatedData = []
for(let i=0; i < peopleData.length; i++){
peopleData[i].discountPrice = peopleData[i].price / 100 *10;
updatedData.push(peopleData[i]);
}
console.log('updatedData', updatedData);
do with in ES5 Regular function.
const updatedData = peopleData.map(function(item){
item.dicountPrice = item.price / 100 * 10
return item
})
do with in ES6 fat arrow function.
const updatedData = peopleData.map((item)=>{
item.dicountPrice = item.price / 100 * 10
return item
})
console.log('updatedData es6 function ', updatedData)
now you can see above code we get same result of if we used normal loop / ES5 Regular function and ES6 fat arrow function.
4. sort method is used to sorting data base on two element .
now let's check the code of sort method .
const sortItem = peopleData.sort(function(a,b){
return b.age - a.age
})
console.log('sortItem', sortItem)
const sortItem_2 = peopleData.sort((a,b)=> a.price - b.price)
console.log('sortItem_2', sortItem_2)
we used to first Descending order the data in base on age we apply to age sorting in ES5 Regular function.
and in second method we used to ES6 function and sorting the data base on price in Ascending order in single line code.
5. Reduce method now check this method in javascript . now check first we used to normal loop in javascript.
let ageDataTotal =0if you get more internist thing learn in javascript then go to my youtube channel and check to some more interesting video:- https://www.youtube.com/c/AzadMalikRohit
for(let i= 0; i < ageData.length; i++){
ageDataTotal = ageDataTotal + ageData[i]
}
console.log('ageDataTotal', ageDataTotal); // ageDataTotal 269
now check with Reduce method in ES6 fat arrow function and get the total sum of age in the below code.
const ageTotalSum = ageData.reduce((totalSumofAge, current)=>totalSumofAge + current, 0)
console.log('ageTotalSum', ageTotalSum); // ageTotalSum 269
now check with Reduce method in ES6 fat arrow function and get the total sum of productData price in the below code.
const prodctTotalValue = peopleData.reduce((totalSum, current)=>totalSum + current.price, 0)
console.log('prodctTotalValue', prodctTotalValue) // productTotalValue 136500
Friday, January 8, 2016
How to create a element in jquery ?
Hi it's very simple download to jquery plugin and write some code Define a variable assign to value as like this
Jquery Code here
$(document).ready(function(){
// Create a HTML Tag Code here start
var newDiv = document.createElement('div');
$(newDiv).addClass('wraper');
$(newDiv).attr('data-role','wraperDivAttribute');
$(newDiv).html('This is wraper section');
$(newDiv).appendTo($("body")) ;// wraper div append to body
// Create a HTML Tag Code here end
});
Monday, July 6, 2015
How to create Accordion in simple jQuery code .
How to create Accordion in simple jQuery code .
It's very simple now create simple html code and apply this simple jquery code as like this
HTML Code here
<div id="accordion">
<h2><a href="#">Accordian Tab 1</a></h2>
<div>
<p>Accordian Tab 1 Data</p>
</div>
<h2><a href="#">Accordian Tab 2</a></h2>
<div>
<p>Accordian Tab 2 Data</p><br />
</div>
<h2><a href="#">Accordian Tab 3</a></h2>
<div>
<p>Accordian Tab 3 Data</p>
</div>
<h2><a href="#">Accordian Tab 4</a></h2>
<div>
<p>Accordian Tab 4 Data</p>
</div>
</div>
Css Code here
body {
font-family: arial;
font-size: 12px;
}
#accordion h2 {
padding: 10px;
margin: 0;
border: 1px solid #4679bd;
background-color: #4072b4;
font-size: 14px;
border-top: 3px solid #ccc;
}
#accordion h2 a {
text-decoration: none;
color: #ffffff;
}
#accordion div {
padding: 0 10px;
margin: 0;
border: 1px solid #4679bd;
color: #000;
}
Jquery Code here
$(document).ready(function() {Demo Jsfiddle
$("#accordion div").hide();
$("#accordion h2").click(function() {
$(this).next("#accordion div").slideToggle("slow").siblings("#accordion div").slideUp("slow");
});
});
Friday, March 21, 2014
How to Creating Content Tabs with Pure CSS
Creating Content Tabs with Pure CSS it's very simple Try to this code
Demo Jsfiddle
HTML Code here
<ul class="tabs">
<li> <input type="radio" checked name="tabs" id="tab1">
<label for="tab1"> tab 1</label>
<div id="tab-content1" class="tab-content"> Tab Content 1 </div> </li>
<li> <input type="radio" name="tabs" id="tab2"> <label for="tab2">
tab 2</label>
<div id="tab-content2" class="tab-content">
Tab Content 2 </div> </li>
<li>
<input type="radio" name="tabs" id="tab3">
<label for="tab3"> tab 3</label>
<div id="tab-content3" class="tab-content">
Tab Content 3 </div> </li>
</ul>
Css Code here
body, html {
height: 100%;
margin: 0;
-webkit-font-smoothing: antialiased;
font-weight: 100;
background:#90f286 ;
text-align: center;
font-family: arial;
}
.tabs input[type=radio] {
display:none;
}
.tabs {
width: 600px;
list-style: none;
position: relative;
padding: 0;
margin: 75px auto;
}
.tabs li{
float: left;
}
.tabs label {
display: block;
padding: 10px 20px;
border-radius: 2px 2px 0 0;
color: #000;
font-size: 24px;
font-weight: normal;
background: rgba(0,0,0,0.2);
cursor: pointer;
position: relative;
margin-top:3px;
-webkit-transition: all 0.2s ease-in-out;
-moz-transition: all 0.2s ease-in-out;
-o-transition: all 0.2s ease-in-out;
transition: all 0.2s ease-in-out;
}
.tabs label:hover {
background: #0a71a5;
color:#fff;
top: 0;
}
[id^=tab]:checked + label {
background: #0a71a5;
color: white;
top: 0;
}
[id^=tab]:checked ~ [id^=tab-content] {
display: block;
}
.tab-content{
z-index: 2;
display: none;
text-align: left;
font-size: 20px;
padding-top: 10px;
background: #0a71a5;
padding: 15px;
color: white;
position: absolute;
top: 51px;
left: 0;
right:0;
box-sizing: border-box;
-webkit-animation-duration: 0.5s;
-o-animation-duration: 0.5s;
-moz-animation-duration: 0.5s;
animation-duration: 0.5s;
}
Demo Jsfiddle
Section have a fixed position when it hits the top of the screen
How to do this it's very simple here example see below .
Demo Jsfiddle
Jquery Code
var oritop = -100;
$(window).scroll(function() {
var scrollt = $(this).scrollTop();
var elm = $(".scrollTopWindow");
if(oritop < 0) {
oritop= elm.offset().top;
}
if(scrollt >= oritop) {
elm.css({"position": "fixed", "top": 0, "left": 0});
}
else {
elm.css("position", "static");
}
});
Css here code as Sample
body{height:2000px}
.scrollTopWindow {
background-color: red;
width: 150px;
height: 100px;
color: white;
padding:20px;
}
HTML Code here
Some Content here
Some Content here
Some Content here
Some Content here
Some Content here
Some Content here
Some Content here
Some Content here
Some Content here
Some Content here
Some Content here
Some Content here
Some Content here
Some Content here
Some Content here
<div class = "scrollTopWindow"> Scroll top window and fix me ! </div>
Demo Jsfiddle
Wednesday, March 5, 2014
How to create a tooltips with jQuery
simple idea to create a tooltips
HTML
<input type="text" title="Here put your toottips text " />
CSS
.autoSugest{background:#fffdef;border:1px solid #cac6ad;
-webkit-border-radius:4px;
-moz-border-radius:4px;
border-radius:4px;color:#7f7943;
display:none;
font-size:12px;
padding:7px 15px;
position:absolute;
min-width:100px;
-o-box-sizing:border-box;
-ms-box-sizing:border-box;
-webkit-box-sizing:border-box;
-moz-box-sizing:border-box;
box-sizing:border-box;}
.autoSugest:after{
content:url("../../images/tootl-tip-arrow. png"); height:8px;
width:11px;
position:absolute;
top:-13px;
left:38px}
Jquery
$.fn.autoSuggest = function(){ return this.each(function(index, elm){
if(!$(elm).is('[data-title]')){
$(elm).attr('data-title', $(elm).attr('title')).attr('title', '');
};
$(elm).on('focus', function(){
var element = $(this),
posTop = element.offset().top + element.outerHeight() + 10,
posLeft = element.offset().left,
toolTipWidth = element.outerWidth() > 90 ? element.outerWidth() : 250,
titleText = element.attr('data-title');
if(titleText && titleText != ''){
$('<div />', {class: 'autoSugest', text : titleText, css : {left: posLeft, top: posTop, maxWidth: toolTipWidth}}).appendTo('body').fadeIn();
}else{
return false;
}
});
$(elm).on('blur', function(){
$('.autoSugest').fadeOut(function(){
$(this).remove();
});
});
}); };
$(document).ready(function(){
$('input[title]').autoSuggest(); });
Tuesday, July 9, 2013
One Click Select all Checkbox in Jquery
HTML
<label for="selectAll"><input type="checkbox" id="selectAll"> Select all</label>
<label for="ceckbox_1"><input type="checkbox" id="ceckbox_1" class="selectbox">Checkbox One</label>
<label for="ceckbox_2"><input type="checkbox" id="ceckbox_2" class="selectbox">Checkbox Two</label>
<label for="ceckbox_3"><input type="checkbox" id="ceckbox_3" class="selectbox">Checkbox Three</label>
Jquery
$(document).ready(function(){
$('#selectAll').on('click', function(){
$('.selectbox').attr('checked', $(this).is(":checked"));
});
});
Demo Link
Thursday, November 1, 2012
Used to css Reset
Now Used To Css Reset for Best Result of your Website Layout
Used to Normal Css Reset of your Layout
html, body, div, span, applet, object, iframe,
h1, h2, h3, h4, h5, h6, p, blockquote, pre,
a, abbr, acronym, address, big, cite, code,
del, dfn, em, img, ins, kbd, q, s, samp,
small, strike, strong, sub, sup, tt, var,
b, u, i, center,
dl, dt, dd, ol, ul, li,
fieldset, form, label, legend,
table, caption, tbody, tfoot, thead, tr, th, td,
article, aside, canvas, details, embed,
figure, figcaption, footer, header, hgroup,
menu, nav, output, ruby, section, summary,
time, mark, audio, video {
margin: 0;
padding: 0;
border: 0;
font-size: 100%;
font: inherit;
vertical-align: baseline;
}
table {
border-collapse: collapse;
border-spacing: 0;
}
img{
vertical-align:top;
}
If you are using HTML5 Than used to this css Reset
html, body, div, span, object, iframe,
h1, h2, h3, h4, h5, h6, p, blockquote, pre,
abbr, address, cite, code,
del, dfn, em, img, ins, kbd, q, samp,
small, strong, sub, sup, var,
b, i,
dl, dt, dd, ol, ul, li,
fieldset, form, label, legend,
table, caption, tbody, tfoot, thead, tr, th, td,
article, aside, canvas, details, figcaption, figure,
footer, header, hgroup, menu, nav, section, summary,
time, mark, audio, video {
margin:0;
padding:0;
border:0;
outline:0;
font-size:100%;
vertical-align:baseline;
background:transparent;
}
body {
line-height:1;
}
article,aside,details,figcaption,figure,
footer,header,hgroup,menu,nav,section {
display:block;
}
nav ul {
list-style:none;
}
blockquote, q {
quotes:none;
}
blockquote:before, blockquote:after,
q:before, q:after {
content:'';
content:none;
}
a {
margin:0;
padding:0;
font-size:100%;
vertical-align:baseline;
background:transparent;
}
/* change colours to suit your needs */
ins {
background-color:#ff9;
color:#000;
text-decoration:none;
}
/* change colours to suit your needs */
mark {
background-color:#ff9;
color:#000;
font-style:italic;
font-weight:bold;
}
del {
text-decoration: line-through;
}
abbr[title], dfn[title] {
border-bottom:1px dotted;
cursor:help;
}
table {
border-collapse:collapse;
border-spacing:0;
}
/* change border colour to suit your needs */
hr {
display:block;
height:1px;
border:0;
border-top:1px solid #cccccc;
margin:1em 0;
padding:0;
}
input, select {
vertical-align:middle;
}
Source By One
Source By Two
Subscribe to:
Posts (Atom)